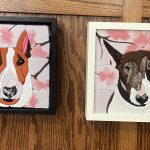
This is an old post from 2023 that I never got around to putting up.
I had a bit of surgery a few years back and despite the ups and downs around that, I decided to make a painting for my surgeon to say thanks (as if the $$$$ I paid him wasn’t enough, lol). Spoiler alert: he loved it.
At the time, I was playing around with a new to me technique where you drip paint on the paper and use a squeegee to pull it down and make abstract shapes. You can also use a credit card to further manipulate the paint and get some interesting shapes in. This project deviated from that significantly lol.
I knew I wanted to do a portrait of his dog, Buddy, so I stalked his personal IG and found a great picture of him. The first step was to use my Cricut to cut out his name, and center it in the middle of the paper. The original image is of the him in the forest, so I tried to get tree looking sticks in the background with the squeegee paint, but I hated it and it just didn’t achieve the look I was going for. Not wanting to waste the paper, I flooded the squeegee with blue and white paint, and with a few strokes, got a great streaky sky looking background.
Then I went in with a dry brush and tried to mimic a green bush around his name, but it was too dark and just looked like a green blob. So I flooded the squeegee with green and white paint, and pulled it along the bottom. Then I pulled the lettering off to reveal the white paper beneath it. The paint was all still wet so it mixed nicely. I let it dry a bit, then went in with brown on a credit card, and scraped a line down on the left, and pulled that to the right before running the card up and down again. It’s an easy and fast way to create texture, and when a bunch of them are lined up, they look like trees.

Then I taped the reference image on the table, and taped the front of the frame (a record frame since he likes music as much as I do and the image was from IG so it’s square anyway), and traced the outline of the dog with black and white Posca paint markers. I picked them up for a similar project I did for my mom, and really like the control you can have with them. Originally, I was going to leave the dog see-through and only do an outline, but it was severely lacking something, so I painted his copper muzzlepouche. It made it look like he had this huge mustache, which like, fine, but when it’s portrait, it has to be bang on otherwise it just looks off. It did, so I added the beard and tried again. This time, it was very clear that the writing wasn’t centered to the dog, and the trees going through the left side of his head just looked weird. I wanted to bring him front and center more.

I played around on my phone and found that filling it in with 40% opacity helped make that distinction, so I headed to the art store to get grey paint and some transparency medium. It didn’t do what I wanted, and ended up with really streaky results, so I decided to just go full opaque with it.
I struggled with the lettering, which is normal for me. I couldn’t figure out how to match it to the glass properly, so I tried tracing with the paint marker on the outside of the glass, and painting with paint on the inside. This wasn’t great, and resulted in squiggly text with uneven thickness. Then I laid the glass on the paper and lined up the lettering from the outside, and pained the inside with the marker and then paint. It went okay, but it was still off a bit because it’s nearly impossible to line two stencils up like that. I think the next one I do, I’ll cut a mirror image of the name so that I can line it up exactly, then paint around it. You can still see a sliver of green underneath, but I think it looks okay.
The collar also had some issues. I used the paint marker to do the design, but I did it rough and quick, and some of the black came off when I painted the teal on top. I don’t think it’s a huge issue, and I didn’t care enough to go back and take up all the paint to fix it. I also thought about adding gold to the tags, even though they’re silver, but I figured I’d be fucking with it forever, so I put a stop to that and focused on the lettering, which I ended up fucking up anyway, but whatever. Sometimes you have to call it and just put the brush down.
Once I was done, I flipped it so the inside painted glass was up against the painted background, and framed it in the rest of the frame.
I was a bit sad to lose that tree behind his head on the left, but I think the image is better centered, and the tree doesn’t pull away from the face as much. And he’s really front and center now. Anyway, I’m a lot happier with it like this. I know it’s weird to give your surgeon gifts, but sometimes I see something, or I get an idea for something and I have to make the thing. If he doesn’t want it, I’d understand and wouldn’t be butthurt. I had a hairstylist once refuse a portrait I’d done of her cat (she didn’t see it but didn’t want it). No problem. I was going to re-use the canvas (because who wants to put a pic of someone else’s cat up?) but I ended up using it as a test for resin coating, and it’s up in the kitchen, under one I did of Tug.