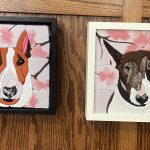
Lala Kinusaiga

No Comments »

Last weekend, I saw an IG reel about the art form of Kinusaiga, or, painting with fabric. I liked the quilted look with no sewing, so I thought I’d give it a try.

I shelled out about $10 for the foam at Home Depot, and $20 for 5 sheets of sticky adhesive transfer tape on Amazon, and even though I’d never done this craft before, armed with half the confidence of a mediocre white man, I jumped in.

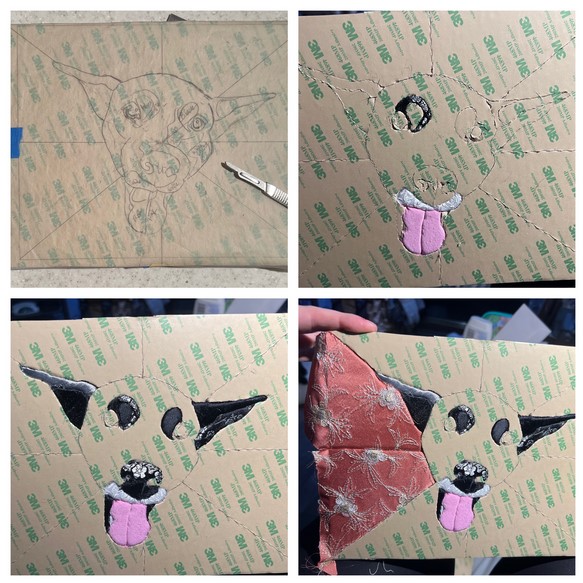
I started by cutting the foam and sticky tape to size, and sticking them together. Then I used my iPad as a light table and traced an image of Lala’s face onto tracing paper. I taped that tracing paper to the back of the foam, and used a scalpel to cut out the stencil.

Then I peeled the backing off and used that cutout as a guide to how much fabric I needed to cut for the piece. I trimmed it to size, and peeled off the backing and stuck it to the sticky tape. Then I went along the lines with a stitch ripper and tucked the ends in as I went along.

For never having done this before, boy did I learn things! You can see here that I had done her eyebrows first, and I was really happy with the fact that I used the silver cherry blossoms to mimic highlights in her fur. But when it came time to put the pieces down for the rest of her face, I had to guess at where the eyes were and it was much harder than I would have liked.

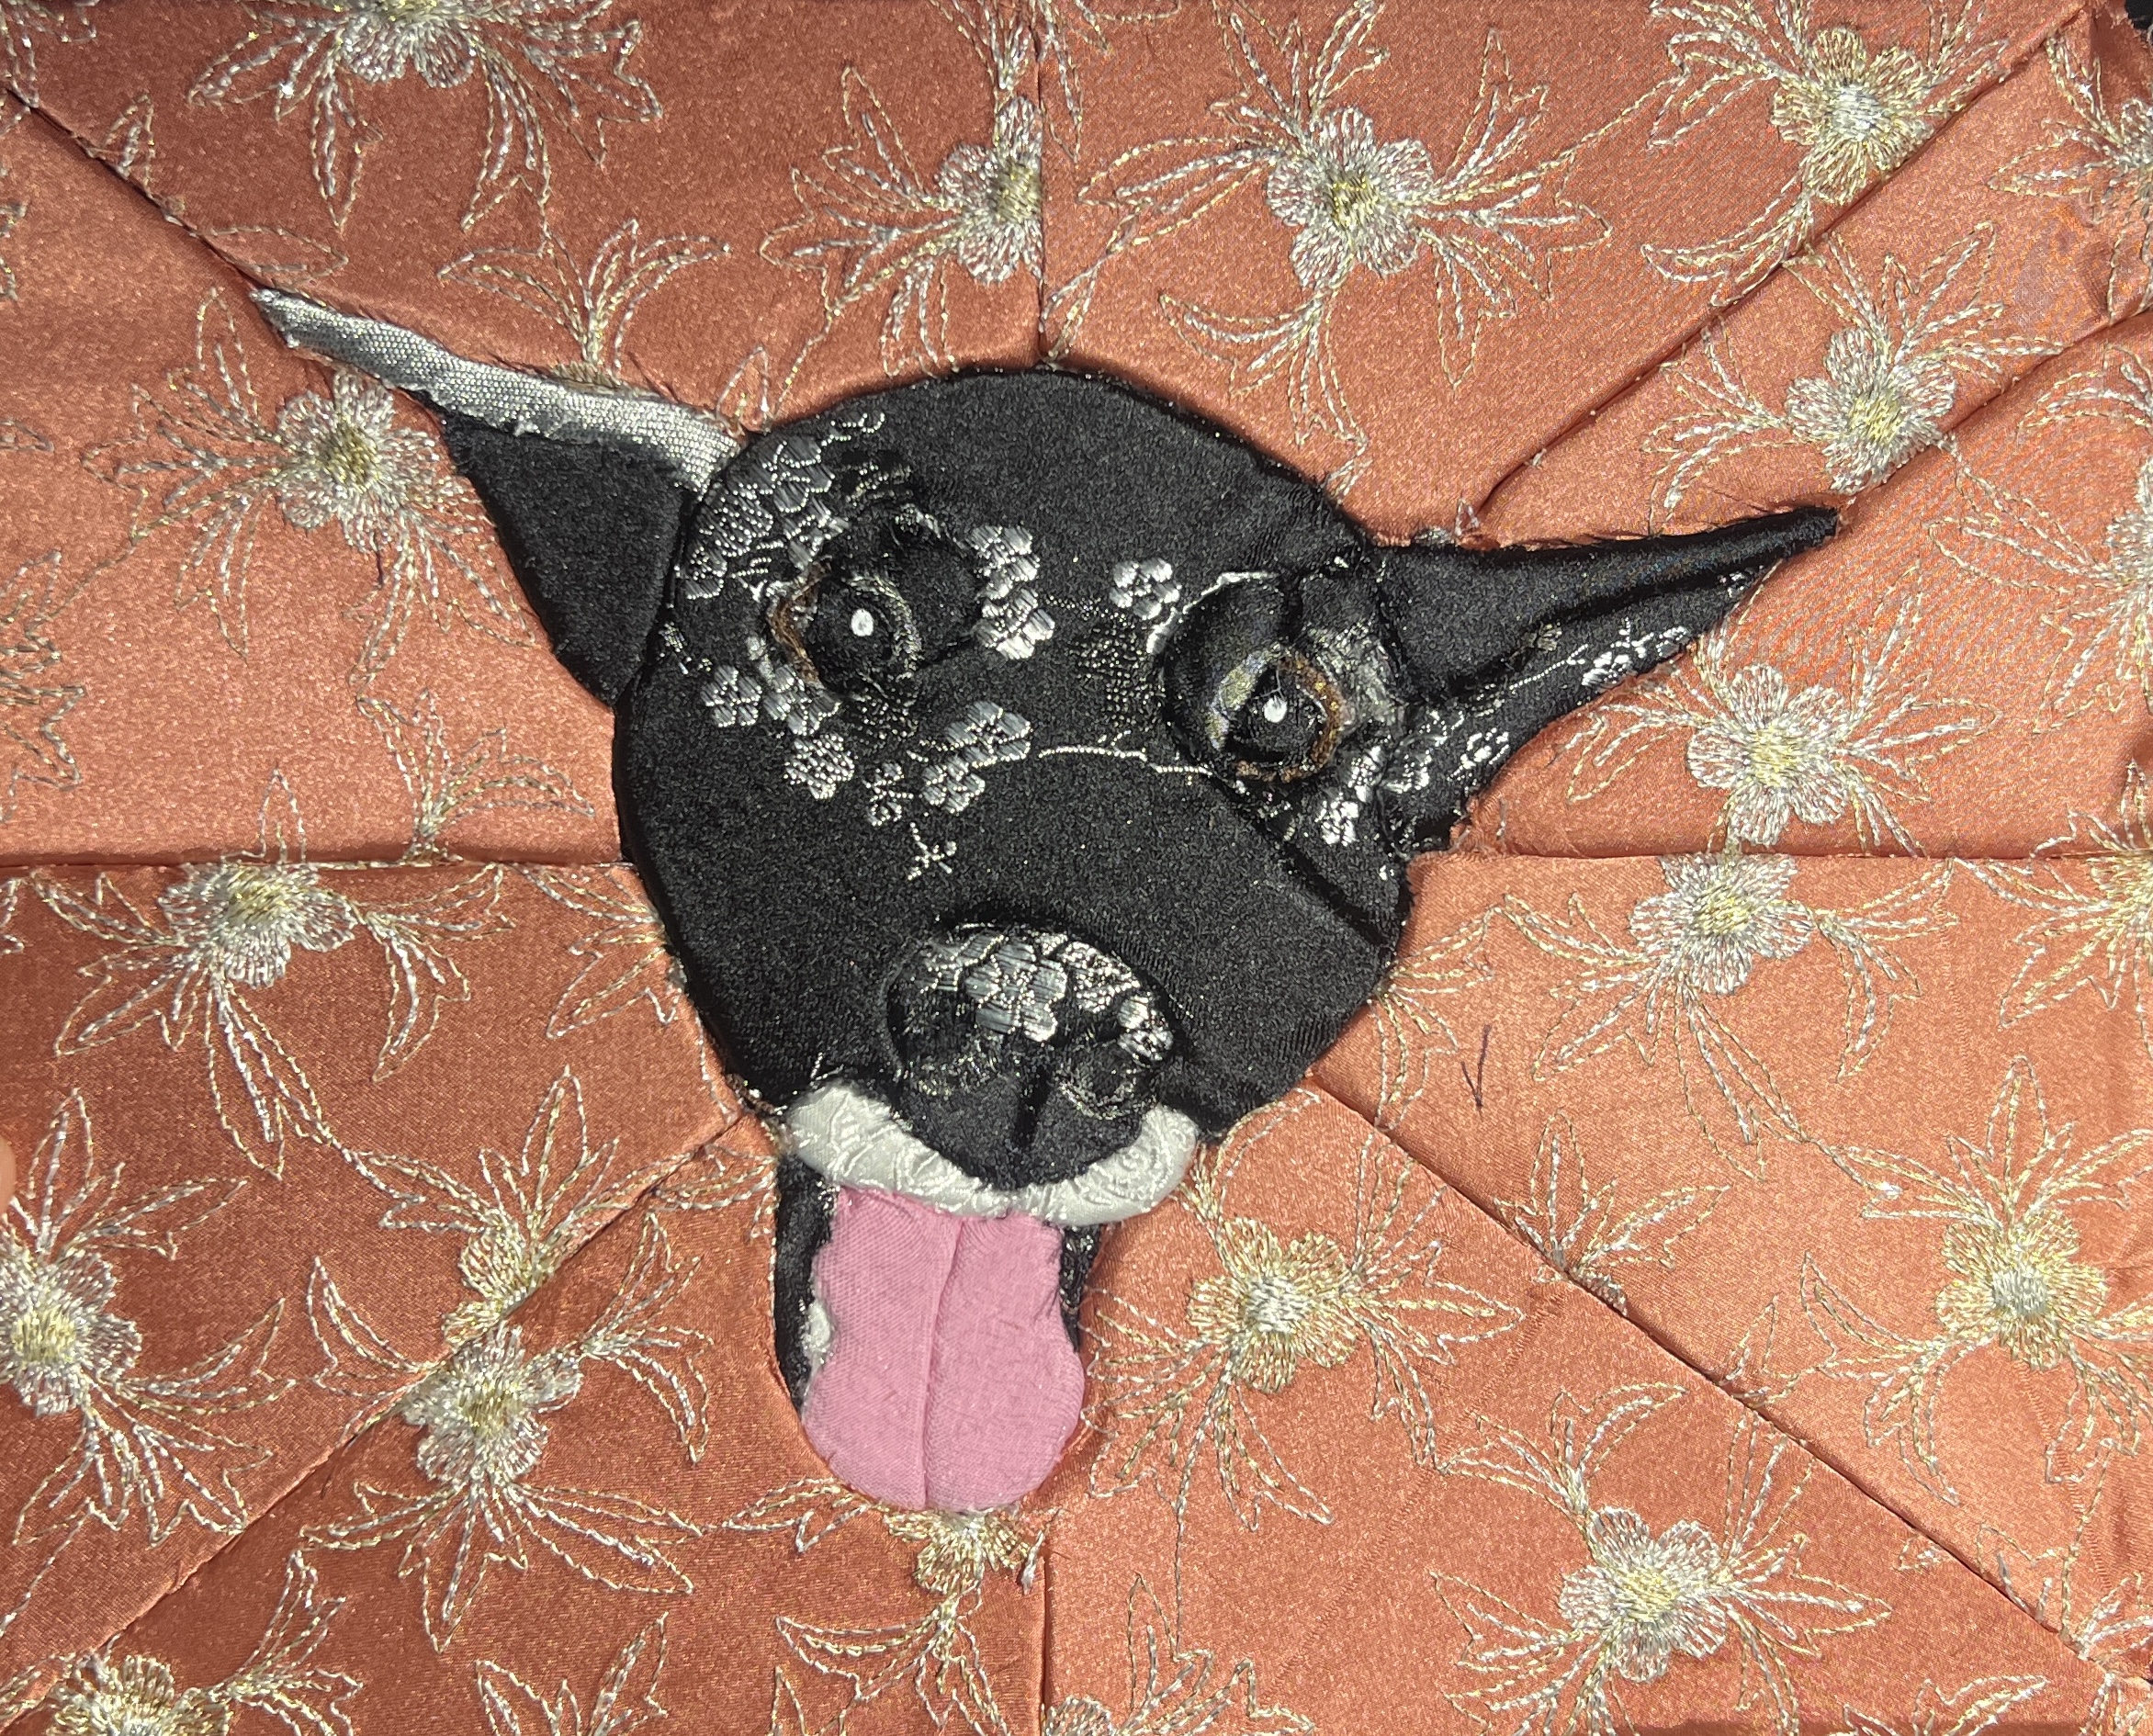
Also, pretty much as soon as I finished, the OP made a post about how to draw a stencil from a picture of a dog, and how she did the eyes made so much more sense. The key is to make more seams around the eyes so that you don’t have to fuss with sticking fabric into a circle. Smart. You can see in the finished product that I had a hard time getting the brown of her irises in there, so they’re pretty hard to see. I also added a seam under her cheek in order to get the fabric into a tight spot, but it makes the rest of the face look pretty flat. If I do it again, I will make more seams up the sides of her nose to give it a bit of depth.

The fabric you use is also very important. I’ve had the Chinese brocade silk for years, and the vintage 50s pink fabric even longer, so I wanted to use what I had on hand. The brocade is gorgeous, but I noticed that if I didn’t cut the fabric long enough, it would fray and come undone. A lot of the weave on the back came apart and I ended up with wisps of it floating through the air and getting up my nose. I also nicked it with my fancy sharp scissors a few times, so I had to be careful with how close I got with trimming.

I also used a chrome marker and some white paint to help identify her eyes better. It’s mixed media anyway, right?

I also didn’t cut enough fabric to trim the edges, so I think I will stick some thick black ribbon around the border so you don’t see the foam. I bought some frames but I think they’re too shallow/the foam is too thick, so the next step is to try to router out the inside supports for the frames, and then cut the foam in half. Had I been thinking, I would have bought the 1/2″ foam, but I sometimes get fixated and want to get the exact same supplies as the example.
Posted on April 16th 2026 in Dogs, Kinusaiga

Easter bunnies and cards for the work crew

No Comments »

For each holiday, I usually make a craft for my work crew. I haven’t posted the one for Valentine’s day yet, so you’ll just have to take these out of order.

I got the idea to make these mason jar bunnies from a reel I saw on IG. I picked up six mason jars and six plaster bunnies from the dollar store. Six, because there are 3 people on my team, 2 TLs, and my boss. I usually make something more elaborate for my immediate team, and then something thoughtful for the rest, because I don’t want to make 15 elaborate gifts for everyone :\

I went to Michael’s to get some spray paint. I initially was going to do a chalk pastel colour, but I didn’t like anything they had. I fell for this gorgeous teal colour, but was suspicious of it’s opaqueness. Two ladies there repeatedly and wholeheartedly assured me it was indeed opaque. It was not. I had suspicions because I had fallen for a similar black finish last year. No matter, I had the teal paint on hand, it was just another step I had wanted to avoid.

So I glued the bunnies to the lid with Gorilla Glue (first time I worked with it – there are pros and cons), then painted them with two coats of teal, then spray painted them with the teal glitter. Now I’m not good at spray paint, and I realized the bunnies had this white cloud on them. Turns out, that’s called bloom and it happens if it’s too cold when you spray, it’s too hot when you spray, if you spray too close, if you spray too far, if it’s Tuesday, if it’s raining, whatever. I don’t honestly know. The only way to fix it is to sand and re-spray.

I didn’t want to do that because the bunnies are plaster, so I ended up re-painting the bloom spots, and re-spraying.

Then I used some ribbon I’ve had on hand for probably close to 20 years, and glued it around the bottom of lid. I filled the jars with paper Easter grass and chocolates. If there’s anything I’d do differently, I’d pay attention to how the lids closed. If you don’t have a rabbit on the lid, it doesn’t matter where they line up when you close them. But if you want the front of the bunny to face the front of the jar (with the writing on it), then you need to make a mark on the lid to align the bunny with the mark. I don’t think anyone will care, but it’s just one of those things I realized after I was done. I also realized I didn’t care enough to fix it. Oh well. Lesson learned for next time.

For the rest of the team, I picked up treat bags and filled them with grass and chocolates. I also made little business card sized cards with a stamp on it to identify who the present was from, but I didn’t bother photographing them.

Then I made six cards to go with the six bunnies. It’s probably the most layered and complex card I’ve done in awhile, so they took FOREVER, but I bought new paper so was excited to use it. I of course didn’t NEED new paper, but whatever. Michael’s had a saaaaale.

Then last night, I snuck into the office with my bestie to deliver the presents because I like making sure folks get the gift before the actual holiday. I was happy to deliver them because I started this project back in February, so it was good to get them out of the house.

And that’s Easter, 2026! Next event will be Canada Day, but we’ll see if I end up making something elaborate or if I just get everyone Canadian flag boppers or something.

Posted on March 31st 2026 in Cards, Paintings, Work peeps
×