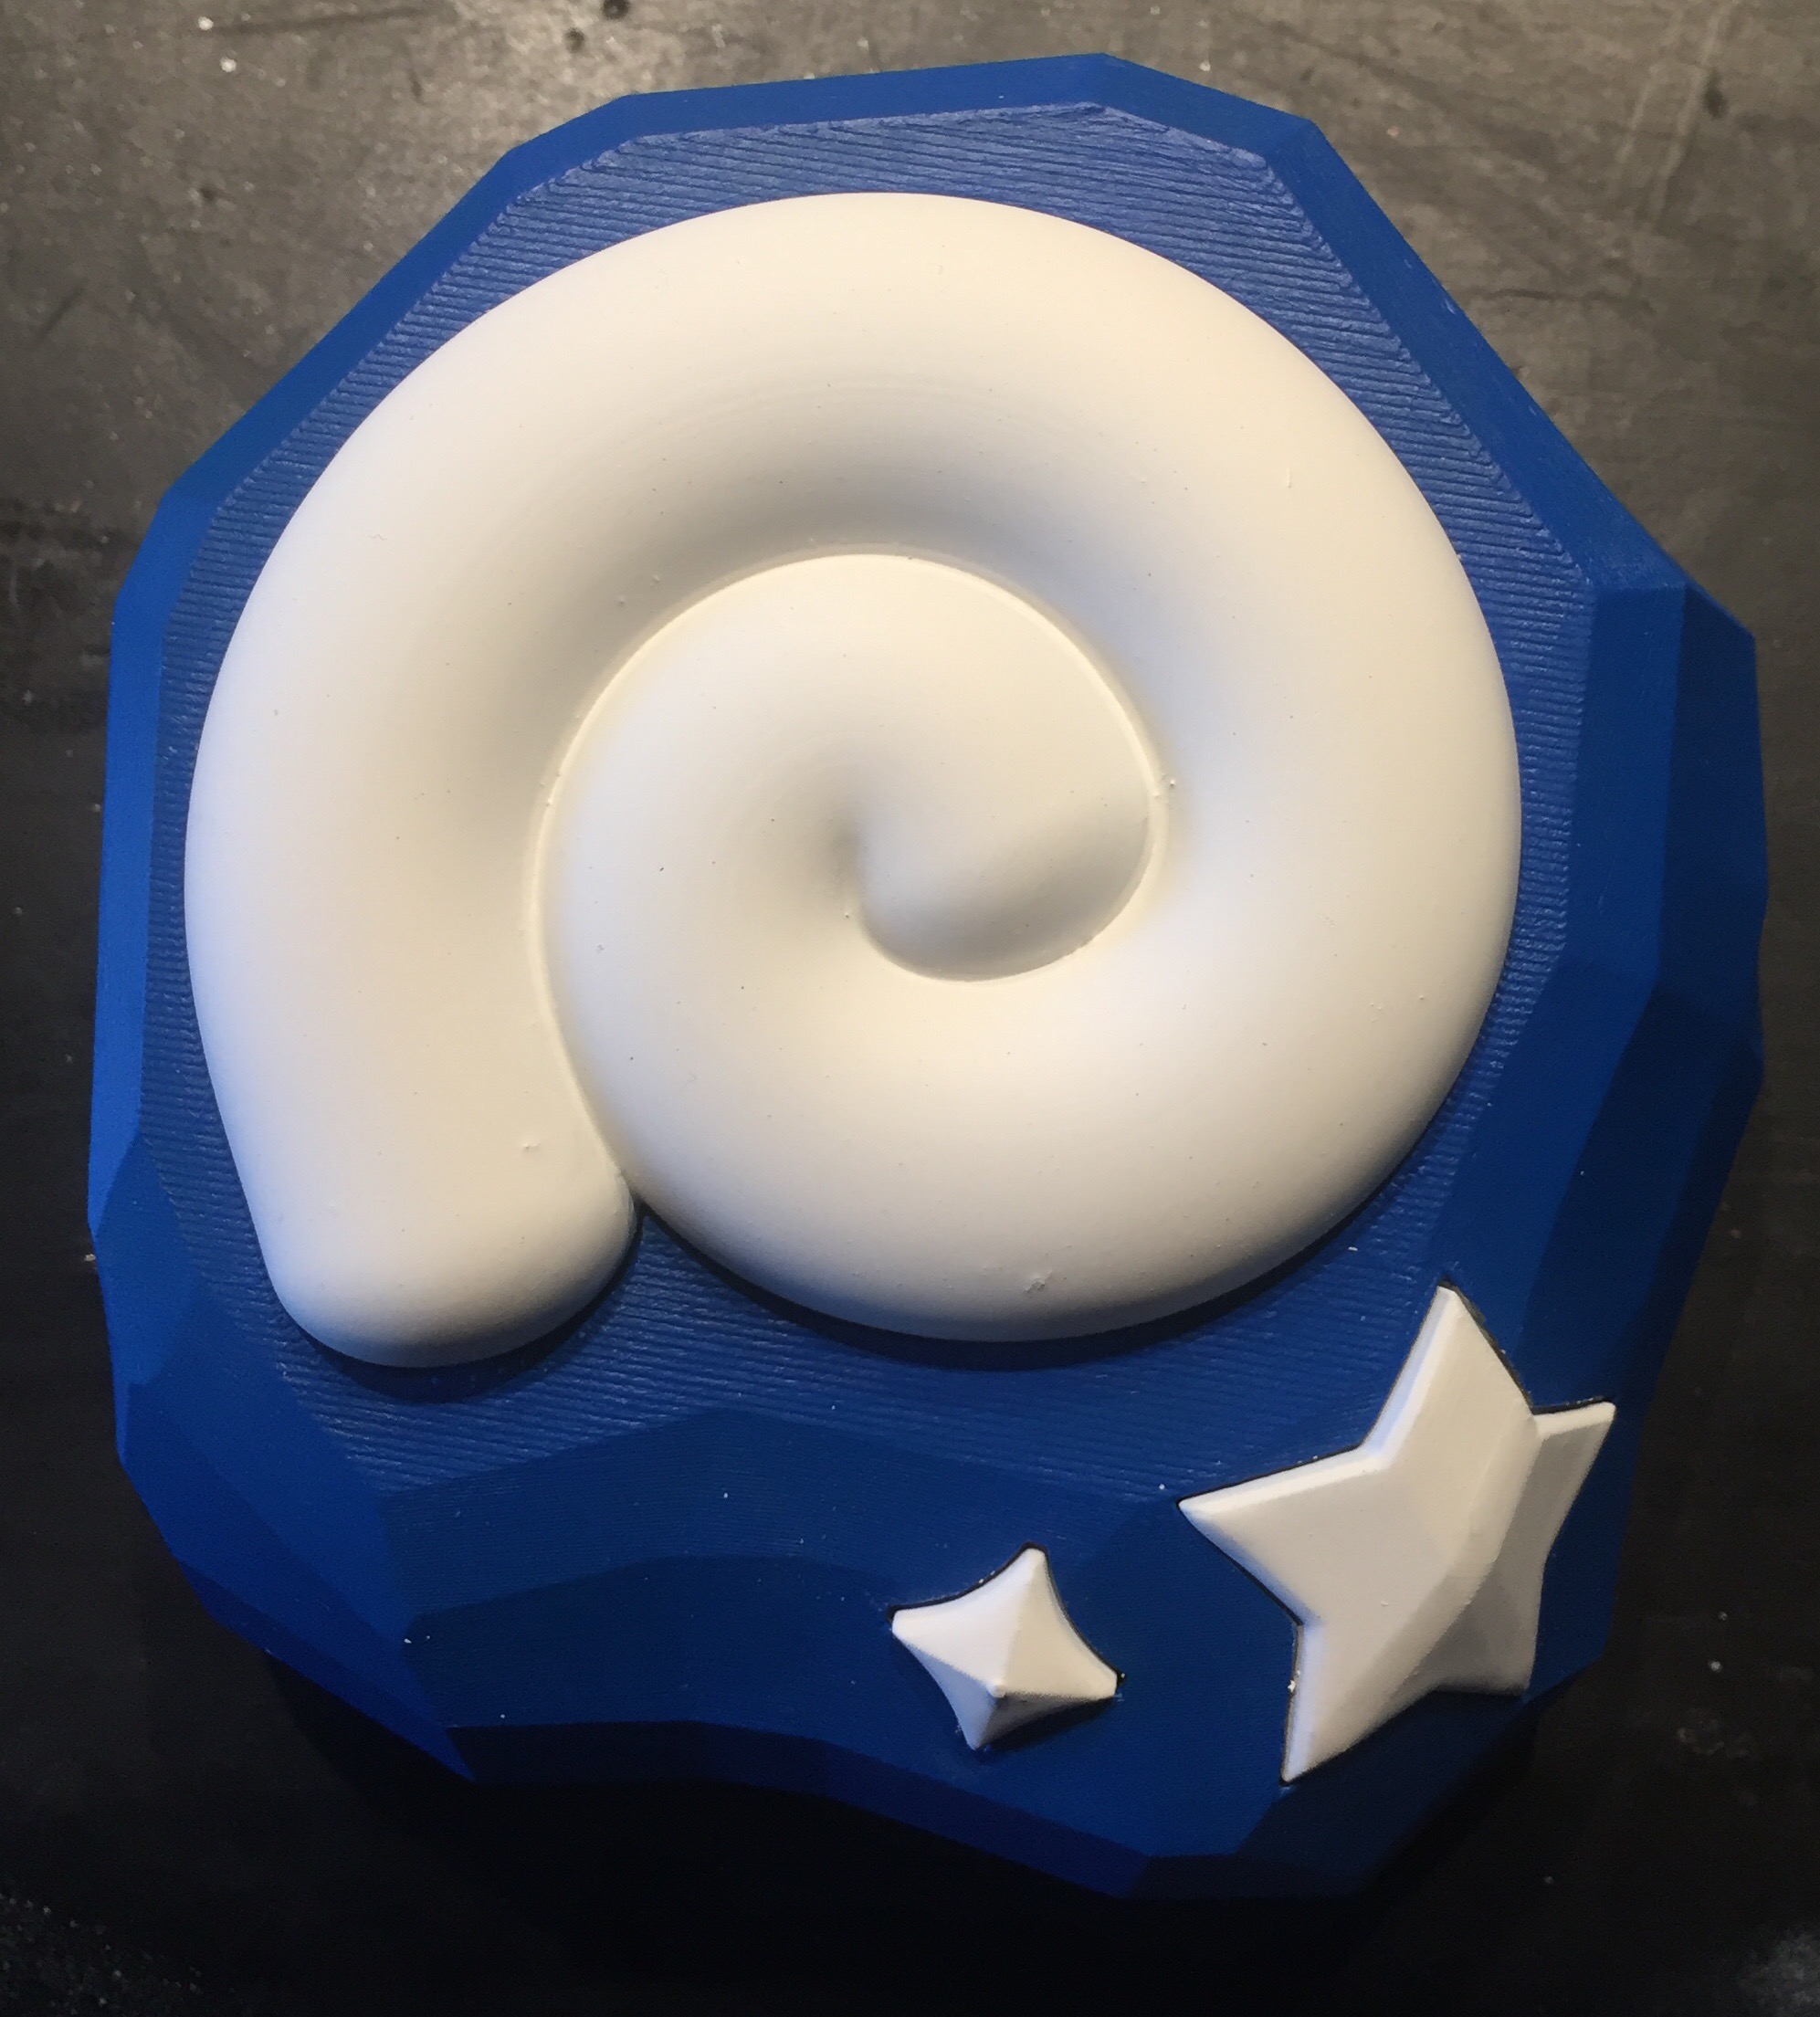
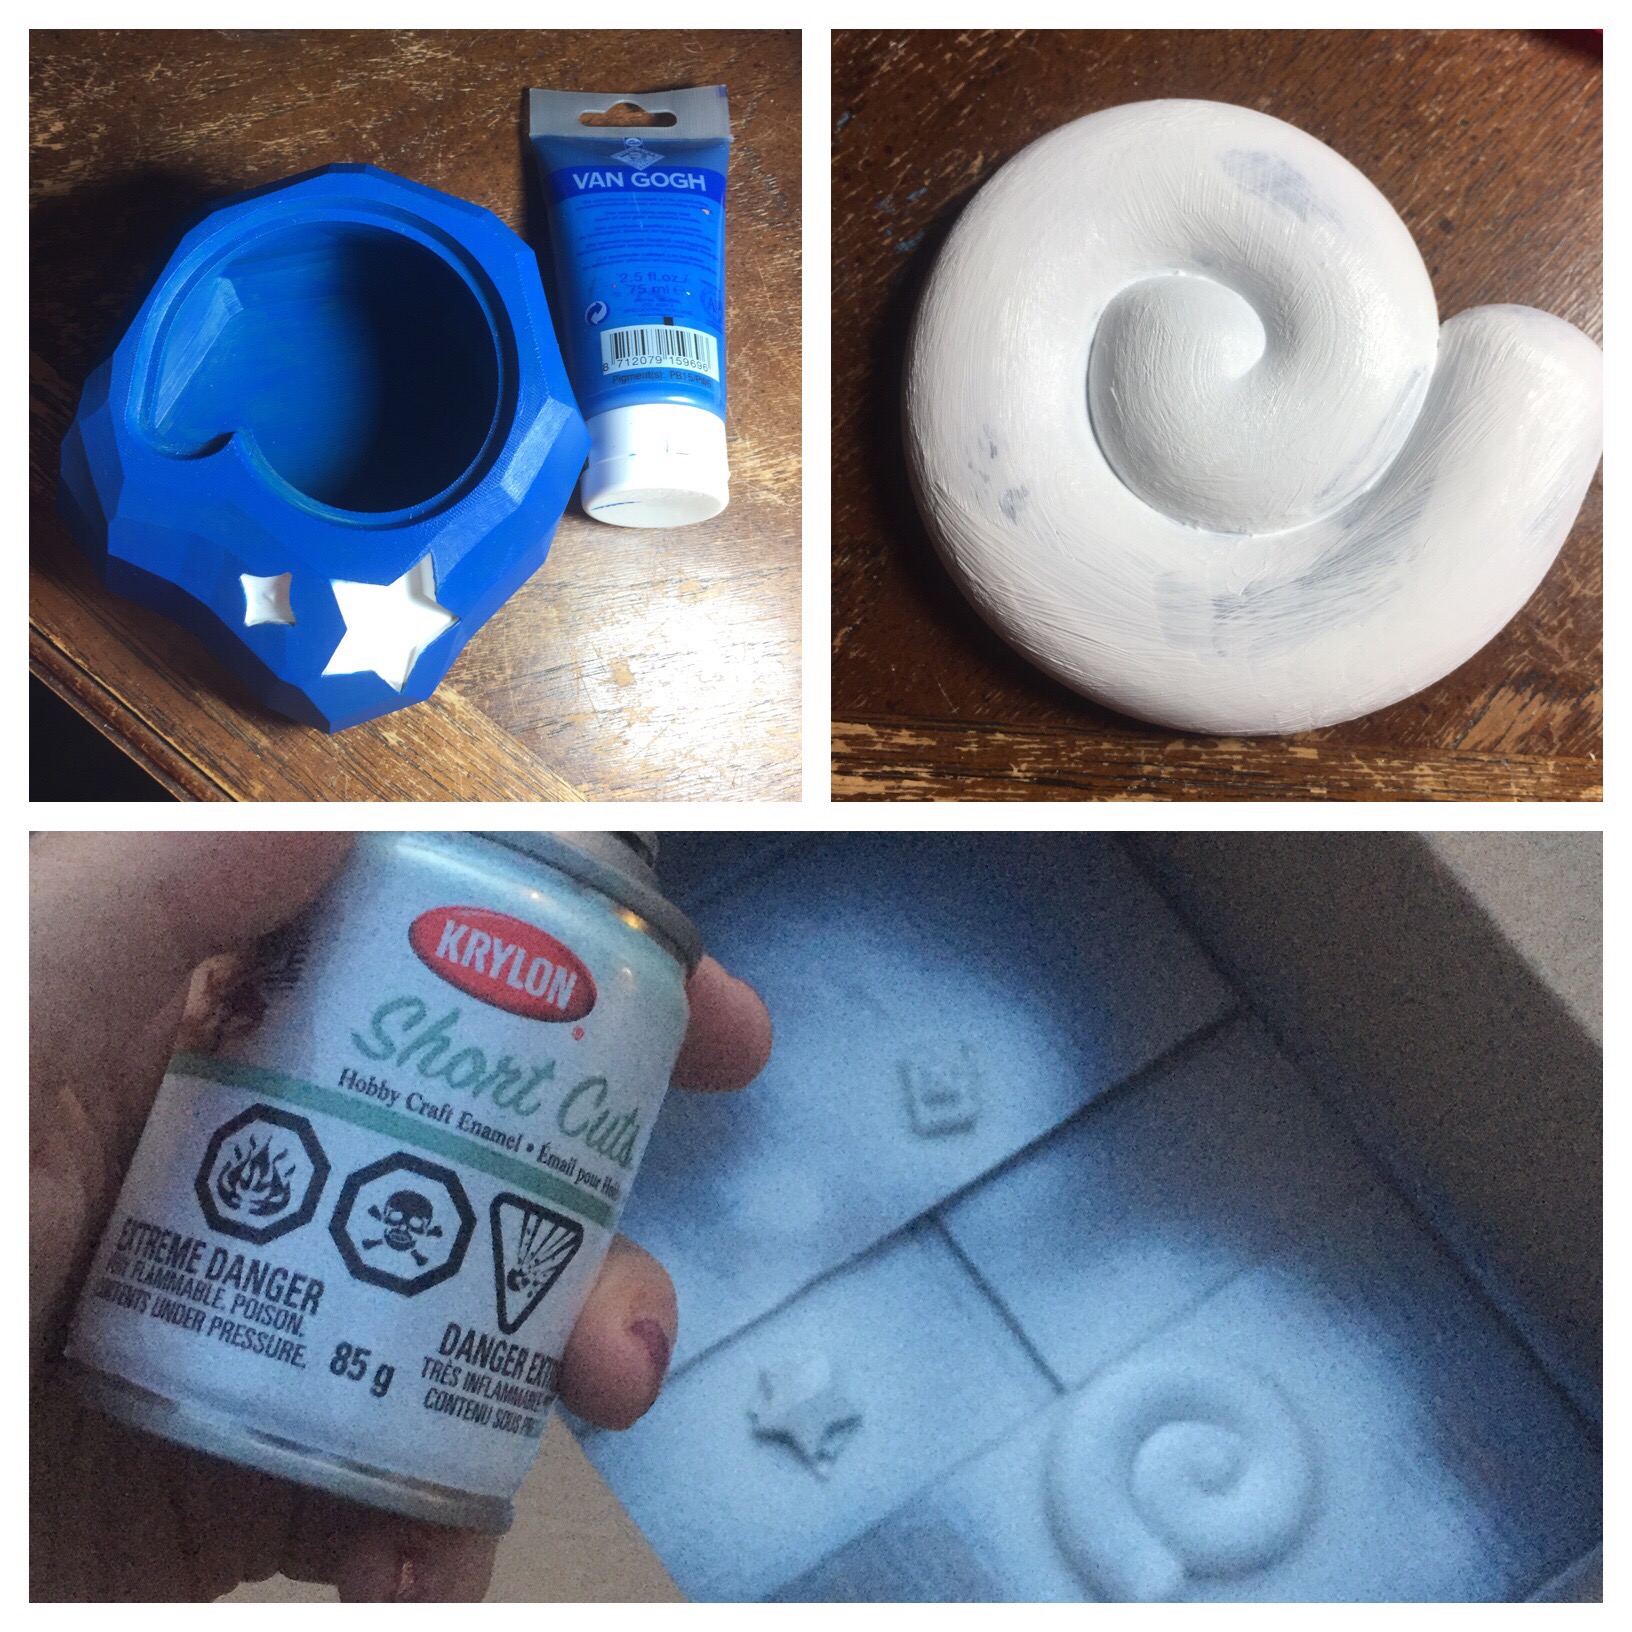
This 3D print project was a long time coming. I started printing it about this time last year, but had several setbacks – printing failures, broken PLA, clogged extruder. The little stars were first, then the spiral. I made a big push a few weeks ago and got the box printed. I painted it last weekend, but didn’t like how the white paint was hitting it, so I went and got some white spraypaint, and I’m much happier with the result. This will live on my work desk, and hold hair elastics!
A few weeks ago, I noticed that some critters were getting into my recycling bin and literally eating the plastic containers. I would find them strewn all across the deck, and stashed in the shrubbery on the side of my house. They eventually resorted to eating the blue bin itself, which was completely unacceptable. I looked into buying a deck box, but none were the right size and all were very spendy. So a friend and I took to designing a box that would fit.
First off – I grossly miscalculated how long it would take to build this thing. The first day was spent picking up materials. The second day was spent cutting wood and slowly building the box.
Brown cow dog cares not for your building a box
We got most of it done the second day, and were finally finished building on the third day. We used a wood putty to fill in the cracks on top, and sanded about eight gazillion times. One thing we learned (it’s a pretty big DUH): do not cut boards that are still wet!
Let’s do the time warp…
I tried to soak that warpy board in water & wood glue, and used clamps and braces to try and straighten it out, but no dice. Oh well.
Because I’m a masochist, I decided to stain the thing. Now, while I am 100% a “more is more” kinda gal, this is NOT THE WAY with stain. Stain is very much a “less is more” kinda gal, which became immediately apparent when I started staining the thing. It took a LOT of coats to be really dark, and I realized that you don’t get a lot of wood grain through the stain.
To add difficulty to annoyance, I wanted to stain the top two different colours in a dog pattern. It involved a) transferring the design to the top of the box with chalk b) tracing the design to the top of the box c) digging a little trench with blades to try and stop stain leeching d) staining the top one colour many times e) staining the dark around it after and f) using a small paintbrush to stain the dark on the light. All of that = PITA.
Questioning my sanity at this point
Once the stain had dried (I’ve lost count of what day I’m on at this point), I decided to coat it in a weatherproof spray. Initially I wanted a thick resin coat, but couldn’t find exactly what I was looking for, so settled for aerosol spray. It was legit 45 degrees C with humidity in the garage, so we wrassled this fucker into the basement where I set up a fan and sprayed the bejesus outta it. After another week or so had passed (it takes forever for the spray to harden and when you do about eleventymillion coats, it takes longer), we brought it outside to live on the deck. I found some little paving stones lying around the garage and put the box on them so it doesn’t rot (even though I sprayed the bottom). You can clearly tell that the top has less stain than the sides, and I really like the wood grain look, so going forward, less stain.
Not bad!Screw you, rodents!
The last step was installing hydraulic hinges so that it stays open by itself. I was hoping it would be soft-close (it’s soft-open!) but it is not. It will bang loudly shut if you don’t guide it with your finger. But whatever, it’s done, and I am 100% glad to be finished. The project took several weekends (3 or 4?) and cost roughly $200 CAD, with some of that being new tools like a hacksaw and a replacement blade for my mom’s hacksaw.